Here's How I Refurbished An Old Set Of Bullitt Wheels For My Mustang
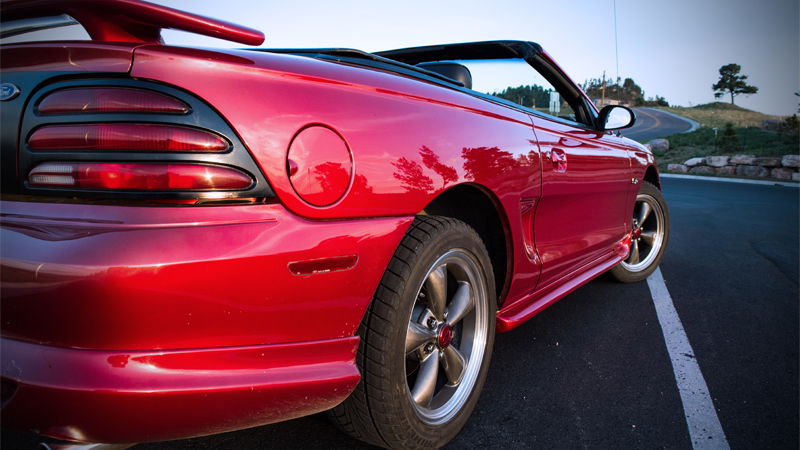
Last month I plunked down $100 for a well-worn, slightly thrashed set of factory Ford 17-inch Bullitt wheels for my 1995 Mustang. By well-worn, I mean these rims had more rash than Sebastian Loeb’s skidplates. By slightly-thrashed, I mean they were beat down harder than Alex Kersten’s arm-wrestling loss to Rory Reid. I could’ve bought a new, generic set of 17-inch Bullitts for a bargain-basement price of $300, but where’s the adventure in that? Also, I’d just spent several bills on 3:73 gears for some much-improved acceleration, so yeah, I was being cost conscious.
I’ve also been keen to try and properly refinish a set of aluminum wheels. I’m not talking about a quick coat of paint, but actually sanding out rash and polishing the aluminum back to a glorious shine. After spending a full 10 minutes on the internet reading blogs and watching YouTube videos on refinishing wheels, I had every confidence that I could revitalize these rims better than new.
I was wrong.
Well, I was kind of wrong because hey, that is my Mustang pictured at the top of the page, resting on a good-looking, refinished set of factory Ford Bullitt wheels. They even came with janky tires that I managed to sell for $30, bringing my out-of-pocket expense to just $70. Of course, it took all kinds of blood, sweat and snot to get them presentable. Yes, snot - my nose was so filled with microscopic aluminium specs during the grinding process that I thought the liquid metal version of the Terminator was hiding in my sinuses.
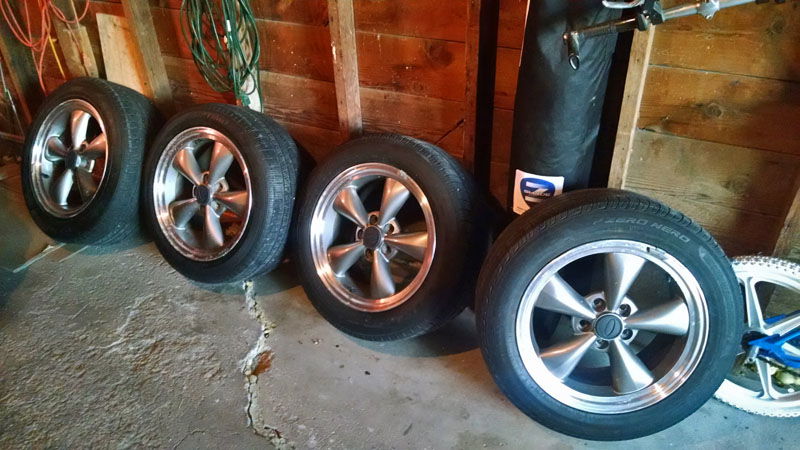
Could I have done better? Sure, but I could’ve done a lot worse, because I think these wheels look pretty darn good for a minimal monetary investment. So for those without a sandblaster, or a shop, or $2000 worth of tools, or a fat budget to spend on new wheels, this procedure isn’t too bad. You’ll still need some gear - various grades of sandpaper, paint stripper, a powered sander or a dremel drill, aluminum polish, and either a high-speed polisher or at least a foam polishing attachment for a power drill. And if you’re planning to paint as well as polish, obviously you’ll need the color of your choice.
Step one was to yank the tyres and pull the wheel weights, then spray down each wheel with a stripping agent to remove all the nasty, crusty, damaged clear coat. Some people recommend doing this after you’ve sanded out all the scuffs and scratches, as the clear coat can protect the aluminum surrounding the scuffs. That could work, but my wheels were such a mess that I just started with the stripping agent. Once all the clear was off I was pleasantly surprised to see much of the damage didn’t make it to the aluminum surface. Had I not done this, I would’ve been grinding away aluminum for no reason.
I used an auto-grade stripping agent in a spray can, letting it sit for about an hour before rinsing the wheels with high-pressure water. I hit them again for an hour to get the stubborn bits off - the rest would come off during the sanding process.
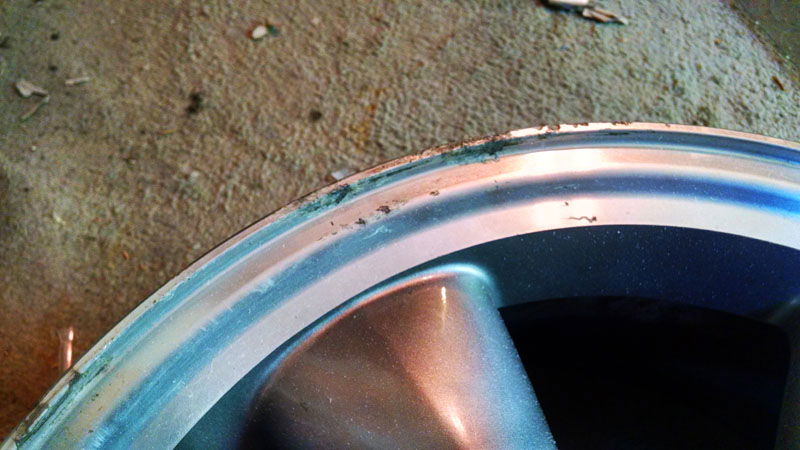
Okay, the scary step - actually grinding on the bare aluminum. If the damage is relatively light, start with 240-grit sandpaper. You can try it by hand if you want, but I was very surprised at how quick a dremel drill with a 120-grit flapwheel did the trick. I started at 120 because my scuffs were really deep - in some cases too deep to completely remove. This is where practice makes perfect; sand the scuff and lightly sand the area around it to try and make the repair nice and smooth. If you go too deep in one spot, you’ll see a small dip once the wheel is polished, making it look slightly wavy. I’ll be honest; my rims have a lot of these dips. That’s partly because this was my first effort, but also because many of the scuffs were just too deep to make it completely smooth. Still, you have to be right on top of the wheel to see these wavy spots. The scuff-free shine they have now far outweighs the dips left from the repair work.
Once all the scuffs are sanded away, it’s time to start removing all your sand marks with wet sandpaper. If you started with 120-grit, move up to 240. From there, I went to 400 grit and started sanding the entire wheel by hand so I could make sure all the old clear was off, and to help blend it all together better. I then stepped up to 600 grit, then 1000 grit, and finally 2000 grit. With each step you’re removing the deeper sanding marks until they are very fine. Wipe the wheel down real good, get out your aluminium/metal polish, and start buffing.
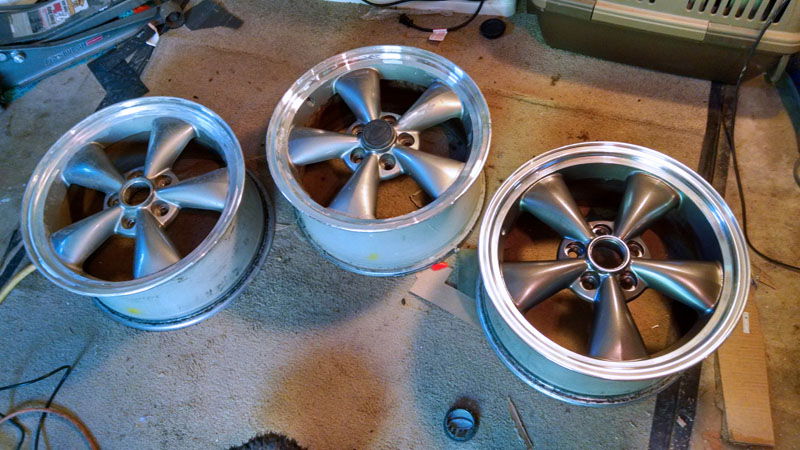
And there you have it - a set of aluminium wheels with scuffs and rash removed, then sanded and polished back to a shine. If you want, go over the wheels with rubbing alcohol to ensure all the polish has been removed, then respray with clear coat to help keep the shine. Or you can stick with the bare polished look, but you’ll need to be diligent on keeping them polished. I knew from the beginning that my wheels were going to have painted gunmetal spokes with a polished lip, so I scuffed the spokes up then masked off the lip and painted away. Once dry I went around the lips with some paint thinner to make sure I had a nice, even paint line. I then clear coated the whole wheel.
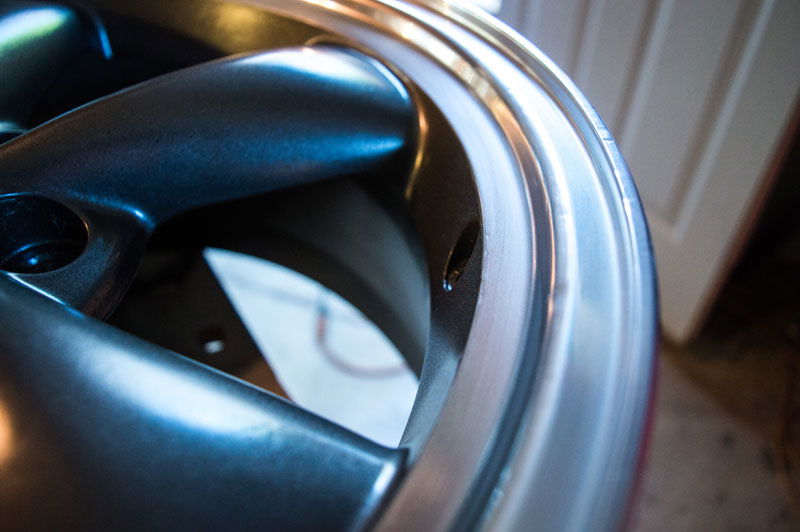
By the time I was done, I spent another $50 in paint, sand paper and materials so at the end of the day, these wheels cost me $120. But, I spent upwards of 30 man hours to get them looking good, and I had to repaint one of the wheels because I didn’t prep it well enough, causing the paint to wrinkle. It was far more labour intensive than I’d planned; had I been able to sand blast these wheels it would’ve been so much easier. And yeah, there were certainly a few times when I thought I’d made a mistake in not buying that new set of wheels.
But now, as they sit on the car in the garage, you couldn’t pry these wheels from my cold, dead hands.
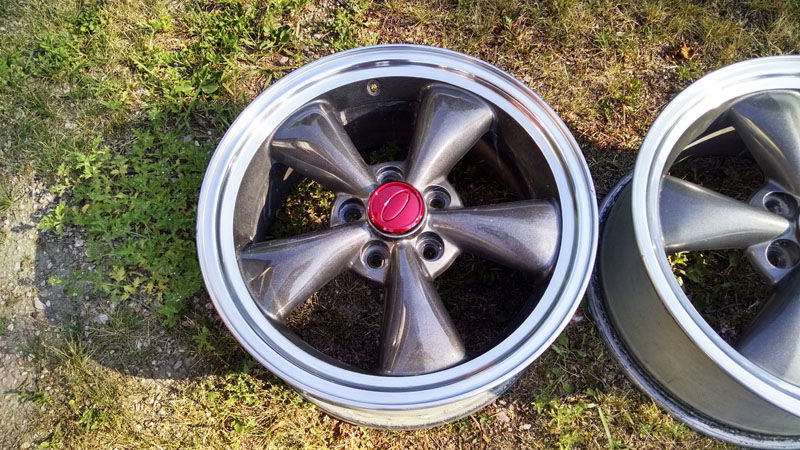
No, they aren’t perfect. But they’re mine. I breathed in the aluminium from these wheels. I bled on them. I massaged them. I gave them new life. I’m not saying people who just buy cool cars or pay others to do all the work aren’t enthusiasts. Nothing could be further from the truth. But when you do the work yourself, there’s a different kind of connection that forms. You don’t just own the car - you bond with it.
And now that I’ve bonded, it’s time for a Mustang-across-America 3500-mile road trip. I leave Rapid City early next month, so stay tuned for more cheap Mustang adventures in the USA.


Comments
You did an amazing job for your first time….they look brand new
Very nice wheels, Try not to destroy them on the curb when you’re driving into the crowd.
@ChrisFix
my grandfathers naibhor has a junkyard full of cars and one of them is a beige old merc estate with some nice old bbs rims sadly its only on the rear of them
Nice wheels, but always thought this model of the Mustang was the absolute worst looking.
Pagination