#TechTip: Commonly Overlooked Things When Installing Wheels
Wheels are simple right? Usually, there are 4 or 5 lug holes to line up, and you tighten the lug nuts and you’re done. This gets the job done, but here are some things you may not be aware of when installing your wheels.
Wheels are simple right? Usually, there are 4 or 5 lug holes to line up, and you tighten the lug nuts and you’re done. This gets the job done, but here are some things you may not be aware of when installing your wheels.
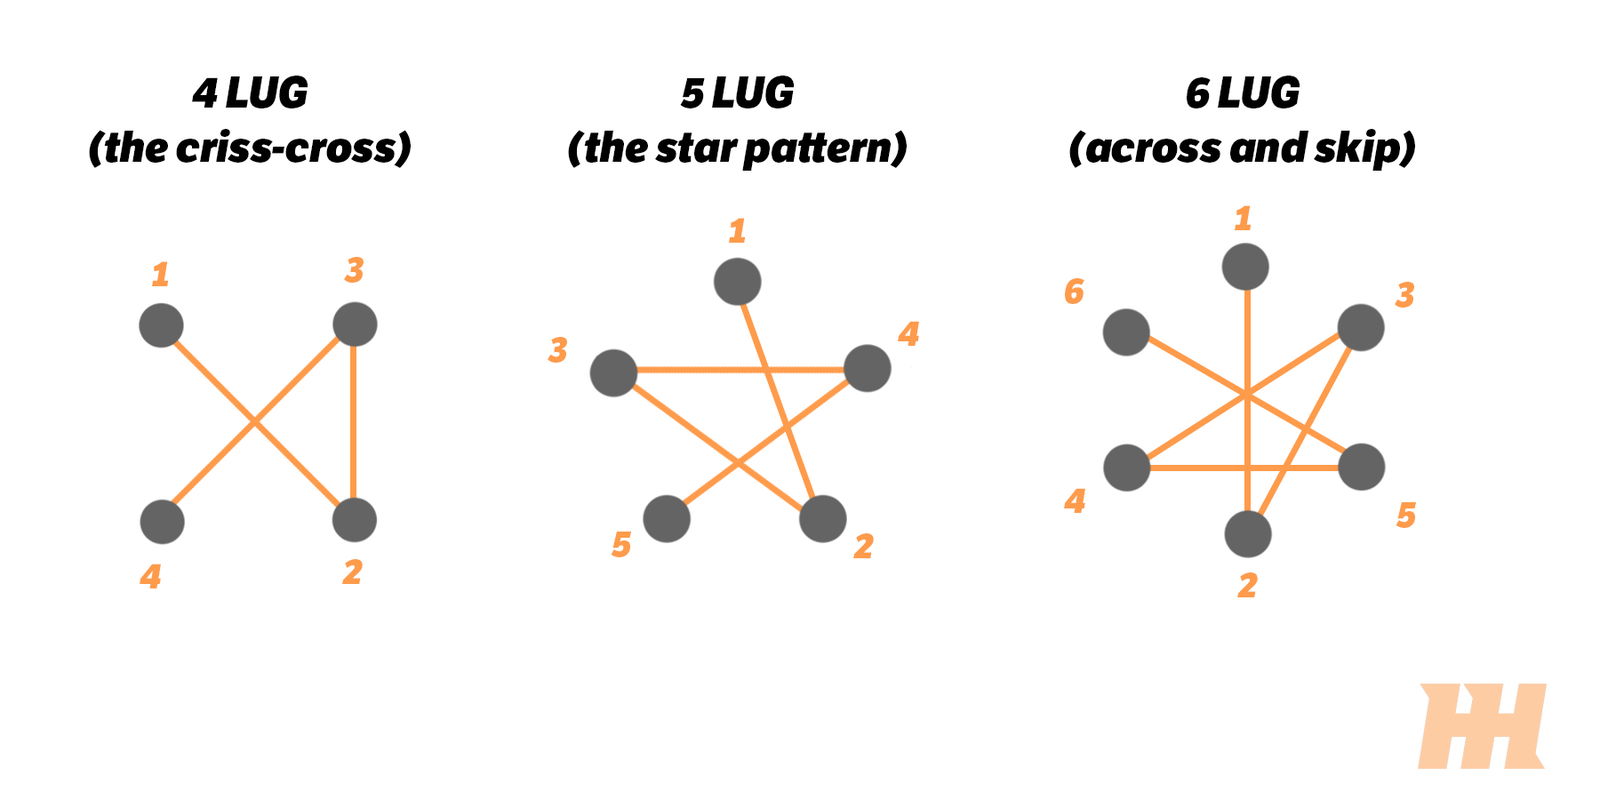
Tighten lugs nuts in the proper pattern
Every lug pattern has a specific tightening pattern required for tightening. This helps to securely and evenly tighten the wheel to the mating surface. Failing to do this can have negative effects on your wheel being centered, and can even warp your brake rotor. Proper torque sequences are as follows:

Keep the wheel centered
If you don’t have a hubcentric wheel (or adapter), make sure you’re rotating the wheel and tightening the lugs in a consistent location. This helps to center the wheel over the lugs, and it can reduce unwanted wheel vibrations while driving. If you’re not quite sure what a hubcentric wheel is, read more here.
Finger tighten lugs first
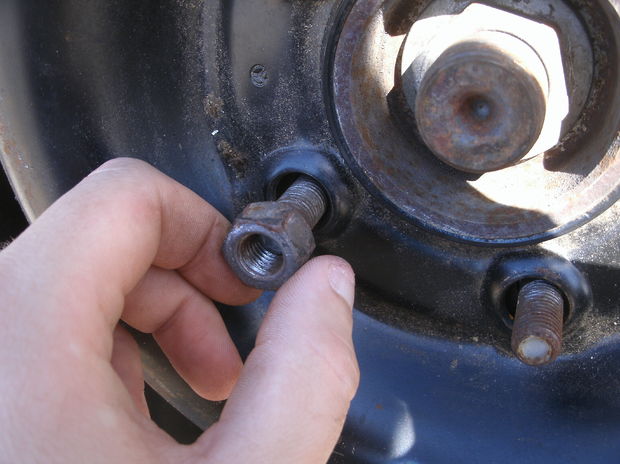
It’s easy to want to go right for the power tools, but this is the easiest way to mess up stud threads. Make sure you hand thread lug nuts before you start tightening them down. It’s best not to use power tools to over-tighten the lugs either. Repeated over-tightening can stretch studs, and will weaken them over time. Tightness is important, but a torque wrench is your best friend for tightening lug nuts to the factory spec.

Make sure you have enough thread for your lugs
When using aftermarket wheels, make sure you have enough threads for your lug nut to get a good grab. The general rule of thumb is being able to get a minimum of 6 rotations of the lug nut after you start tightening it. If you come up short, consider getting extended studs for maximum safety points.


Comments
Which way to do it properly? Tighten all the lugs following the pattern or put all lugs in the place before tighten all of them
I just keep watching the giff
Note from a mechanic: complete your star pattern, and always torque your wheels! Finishing your star patter means going back to 1, since running down the first is to center your wheel to the center of the hub, as you run more lugs down, the wheel is brought closer to the hub until you finish number 5, by that time, out number one will tend to be loose. Torque your wheels in order to preserve your stud and lug’s life (my shop torqued normal vehicles to 100 FtLbs, industry trucks between 125-200 FtLbs. Not sure in newtonmeters)
that moment when auto shops change your tyers and use the rattle gun on setting 1. i swear my thread got stretched
Deeez nuts !
so im at this car website where the users apparently dont know how to put on wheels the right way…
I own the same gloves as a Nascar pit crew I’m pretty much a tire man at this point :P
FWIW with almost any thread all you need is 3 threads of engagement for full strength. Very helpful to know this when building anything with close tolerances. Like when I drill and tap blind holes in the bolsters of a knife handle. I use 2-56 screws and know that I need at least .0535” of engagement to keep it strong.
Any more than 3 threads in kind of unnecessary but always nice
From working at Discount Tire/America’s Tire, I learned all this
Pagination